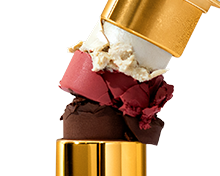
What Is a Contour Stick?
A contour stick is a cream-based sculpting product in a twist-up or retractable stick. It’s an easier starting point than powder contour. Powders need brushes, setting skills, and a steady hand, while a stick lets you place color exactly where you want it. The cream texture also blends easily into skin, so mistakes are easier to fix while you’re still learning.
Cream formulas suit beginners because they move with your skin instead of sitting on top of it. The finish is soft and shadow-like, closer to natural dimension than visible makeup, which is why people who prefer a natural beauty look often choose cream over powder bronzer. Cream also stays workable for a moment after you apply it, so you can adjust placement before it sets.
The stick format is precise and portable, and you don’t need any tools to apply it. Ogee’s Sculpted Face Stick is a certified organic formula made with organic jojoba oil, and its bronze shades, Amber and Copper, double as contour.
Choosing the Right Shade for Your Skin Tone
Pick a shade one to two shades darker than your natural skin tone. That depth reads as shadow rather than a stripe of color. Avoid contour shades with strong orange or red undertones, which tend to look muddy on skin. It also helps to know whether your undertones are cool or warm, since the best contour shade follows your undertone.
Fair to Light Skin
On fair to light skin, reach for light taupe or soft brown. Taupe works especially well with cool undertones and mimics a natural shadow without overpowering a lighter complexion. Anything too warm or muddy will read as bronzer instead of contour. If your skin leans warm, try a light taupe with a hint of warm brown.
Medium to Deep Skin
Medium and deep skin tones can carry deeper, more pigmented shades. Rich browns and warm chestnuts add depth and real definition, especially with warm undertones. Avoid anything too ashy or grey, which can look flat against deeper complexions.
If you’re unsure, swatch a shade along your jawline in natural light before you buy. The right shade melts into your skin and doesn’t stand out on its own. A brand with a wide shade range makes it easier to find a match.
Where to Apply Contour Stick on Your Face
Where you put contour decides whether it looks sculpted or muddy. Good placement follows where shadows already fall, so you define your features instead of covering them. Prep your skin first, then work through the four areas below.
Prep Your Skin First
Start with a clean, moisturized face so cream contour glides on instead of dragging. Apply your usual skincare, let it sink in, then put on foundation or skin tint if you wear it. A smooth base helps any cream product blend evenly, whatever your skin type.
Cheekbones
Start here. Suck in your cheeks slightly (the classic “fish face” trick) to find the hollow just below your cheekbone. Apply the stick there in light strokes and sweep the color up toward your temples at a soft angle. Keeping the line close to the bone gives a natural-looking lift.
Jawline
Run the stick along your jawline from ear to chin for definition and a slimming effect. Then blend down into your neck, a step beginners often skip, so there’s no visible line where your face meets your neck.
Nose
For subtle nose contouring, draw two thin lines down the sides of the nose bridge with short strokes, keeping them close together. Wider lines can quickly look overdone, especially in daylight. Blend the edges gently with a small brush so the nose looks naturally slimmer.
Forehead
Apply contour along your hairline to make the forehead look smaller and add dimension at the top of the face. This matters most if you have a larger forehead. Blend upward into the hairline until the color disappears into a soft shadow.
Adjusting Contour for Your Face Shape
Your face shape changes where contour looks best. On a round face, angle contour a little more sharply from the ear toward the corner of the mouth, stopping before the middle of the cheek, to add length. On a square face, focus on the outer corners of the jaw and the edges of the forehead to soften the angles. Long or oblong faces benefit from contour along the hairline and under the chin, and heart-shaped faces need only a light touch at the temples. Whatever your face shape, start with the cheekbones and build from there.
How to Blend Contour Stick Like a Pro
Blend cream contour right away. Cream formulas set quickly, so work in small sections and blend each one before moving to the next.
Tools for Blending
Each tool gives a different finish. A damp beauty sponge is the easiest for beginners: it softens edges and keeps the look natural. A brush gives more definition when you want a polished, clearly sculpted contour. A dense, angled brush is a favorite for cream contour because it diffuses edges without lifting your foundation. Fingertips work in a pinch, since the warmth of your skin helps melt the product in.
Blending Motions and Final Check
Use small circles, stippling, or light tapping instead of dragging product across your skin. Stippling presses the formula in without disturbing your base underneath. When you think you’re done, check your face in natural light. Indoor lighting can hide unblended edges that daylight shows right away, so a quick look by a window is worth it.
Set Your Contour
For all-day wear, lightly dust translucent setting powder over the blended areas. The powder locks the cream in place and keeps it from fading, and a mist of setting spray at the end melts powder and cream together for a skin-like finish.
Common Cream Contour Stick Mistakes to Avoid
A few habits can make even a good contour stick look wrong. Here are the mistakes beginners make most often, with easy fixes.
A common one is applying too much product in one pass. Cream contour is buildable, so start light and layer gradually. You can always add more, but removing excess mid-blend disturbs your base. Shade choice is another: a contour with the wrong undertone can look muddy or orange. Look for a shade that matches your skin’s natural depth without leaning too orange or too ashy.
Skipping or rushing the blending is where most contour goes wrong, and it leaves a harsh stripe. Take an extra thirty seconds and blend upward and outward until no edges show. Watch your placement too: contour belongs in the hollows of the cheeks. Placed too low, it pulls the face down instead of lifting it.
Finally, balance contour with highlighter. Contour defines and highlighter lifts. A highlighter one to two shades lighter than your skin tone, placed on the high points of your face, brings forward the areas you want to catch the light. Without it, the look can fall flat.
Building Your Contour for Different Looks
A contour stick makes it easy to turn the intensity up or down. The same product works for a barely-there look on errands and a sculpted evening look; you just change how much you build.
Everyday Natural Contour
For a fresh, natural finish, use a light hand and apply one layer. Focus on the cheekbones and softly along the jawline, then blend thoroughly. You want a subtle shadow that gives your face more shape without looking like makeup.
Glam or Evening Contour
For evening, layer the stick in the same zones, building gradually until you reach the depth and drama you want. Blend the same way; just go deeper with the color. Add a highlighter to the tops of the cheekbones, the brow bone, and the bridge of the nose to increase contrast. That high-dimension, sculpted effect reads well in low light.
Start Sculpting With Confidence
Contouring gets easier each time you do it. With the right shade, a light hand, and some blending, you can sculpt and define your features in minutes. Start simple and build gradually as you practice.
Shop Ogee’s bronzer sticks to find your contour shade, or try the Crystal Contour Collection, which pairs Copper with Rose Quartz blush and Opal highlighter for a complete sculpted look.
Contour Stick FAQs
How do you use a contour stick for beginners?
Swipe the stick where you want soft definition: under the cheekbones, along the jawline, around the hairline, and lightly down the sides of the nose. Then blend upward with a brush, sponge, or fingertips until the edges look diffused.
Where should contour stick be placed?
Contour stick usually goes in the hollows of the cheeks, along the temples and hairline, under the jawline, and on the sides of the nose.
Do you put contour stick on before or after foundation?
Most people apply contour stick after foundation and before blush, highlighter, or setting powder, so it blends into the base while still adding shape. For a softer effect, you can apply it under foundation instead.
What is the best way to blend a contour stick?
Use small upward motions with a dense brush, damp sponge, or clean fingertips. Work one area at a time before the cream sets, and avoid dragging contour downward, which can make the face look less lifted.
How do you keep contour stick from looking muddy?
Choose a shade only a few tones deeper than your skin, start with a small amount, and build slowly. A creamy formula that blends easily helps you get soft definition without patchy streaks.